Table of Contents
ToggleDeep cleaning your teeth isn’t just about vanity, it’s about health. Plaque, tartar, and bacteria love to hide in the hard-to-reach spots your daily brushing routine misses. Left unchecked, they lead to gum disease, cavities, and a whole lot of regret in the dentist’s chair. While professional dental cleanings are essential (and non-negotiable for serious tartar buildup), you can bridge the gap at home with the right tools, techniques, and a little elbow grease. This guide walks you through exactly how to give your teeth a thorough, effective clean without leaving your bathroom.
Key Takeaways
- Deep cleaning teeth at home requires the right tools—electric toothbrush, interdental brushes, water flosser, and fluoride toothpaste—to effectively remove plaque before it hardens into tartar.
- Brush at a 45-degree angle to your gumline using gentle circular motions for 30 seconds per quadrant, and floss daily using a C-shaped technique to clean the 35% of tooth surface your brush cannot reach.
- Natural remedies like baking soda paste, hydrogen peroxide rinse, and saltwater rinses can complement your routine, but avoid acidic solutions like lemon juice and activated charcoal that damage enamel.
- Consistency is critical—plaque reforms within hours, so maintain a twice-daily brushing and daily flossing routine rather than relying on occasional deep cleaning sessions.
- Professional dental treatment is non-negotiable for visible tartar buildup, gum pockets deeper than 3mm, persistent bleeding, or tooth sensitivity; at-home deep cleaning is preventive maintenance, not a replacement for professional care.
What Is Deep Cleaning and Why Your Teeth Need It
Deep cleaning, also called scaling and root planing when done by a dentist, targets the buildup your regular brush can’t reach. Plaque hardens into tartar (or calculus) within 24 to 72 hours if it’s not removed, and once it calcifies, brushing alone won’t budge it. This crusty layer clings to your tooth enamel and below the gumline, creating pockets where bacteria thrive.
At-home deep cleaning focuses on removing soft plaque before it hardens, polishing surface stains, and maintaining gum health. It’s preventive maintenance, not a replacement for professional care. If you’ve got heavy tartar, bleeding gums, or pockets deeper than 3mm, you need a dentist with ultrasonic scalers and curettes, not a bathroom mirror and determination.
But if your gums are healthy and you’re between dental visits, a strategic at-home routine can keep plaque in check, reduce inflammation, and make your next cleaning appointment a breeze. Think of it like routine household maintenance, neglect it, and you’re looking at costly repairs down the road.
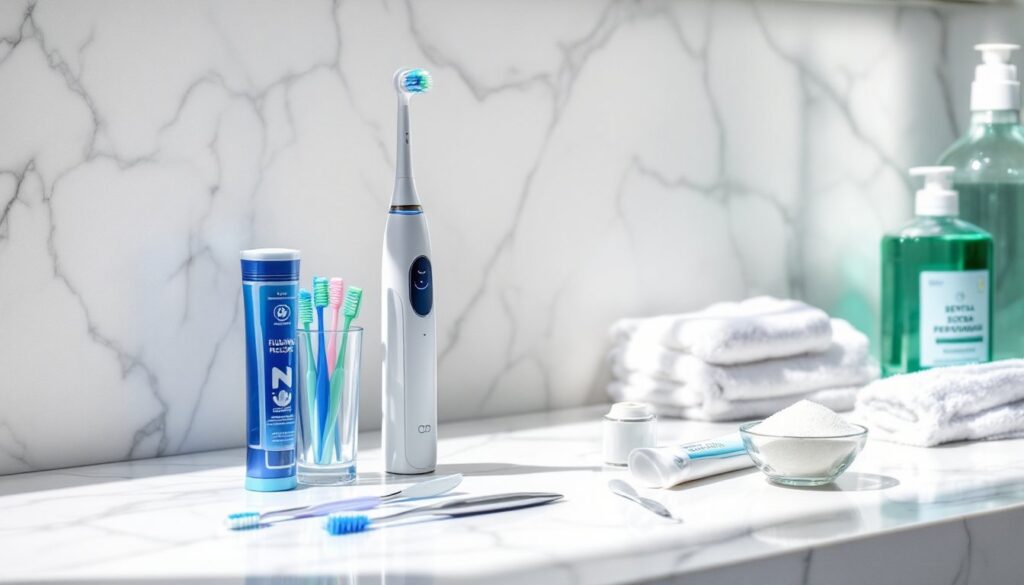
Essential Tools and Supplies for At-Home Deep Cleaning
You don’t need a dental hygienist’s entire arsenal, but you do need the right gear. Here’s what belongs in your deep-cleaning kit:
Core Tools:
- Electric toothbrush with soft bristles (Sonicare or Oral-B rotary models work well: manual brushes can’t match the oscillations-per-minute for plaque removal)
- Interdental brushes in multiple sizes (look for 0.4mm to 0.8mm diameters to fit different gaps)
- Waxed dental floss or floss picks for tight contacts
- Water flosser (Waterpik-style) with adjustable pressure settings, handy for flushing debris from gum pockets
- Tongue scraper (stainless steel or copper: plastic ones wear out fast)
- Dental mirror with LED light for inspecting back molars
Cleaning Agents:
- Fluoride toothpaste (1,000-1,500 ppm fluoride for adults)
- Non-alcoholic antibacterial mouthwash (alcohol dries out your mouth and can irritate gums)
- Baking soda (optional, for gentle polishing, use sparingly)
- Hydrogen peroxide 3% (for occasional use as a rinse, diluted 1:1 with water)
Safety Gear:
- Good lighting, a well-lit bathroom or clip-on mirror light
- Gloves (optional, but helpful if you’re squeamish)
Don’t bother with dental picks or scalers unless you’re trained. Scraping enamel with a metal tool at the wrong angle can gouge your teeth or shred your gums. Leave the sharp instruments to the pros.
Step-by-Step Deep Cleaning Process You Can Do Yourself
Proper Brushing Techniques for Maximum Plaque Removal
Brushing harder doesn’t mean brushing better, it just means abraded enamel and receding gums. Here’s how to actually remove plaque:
- Wet your brush and apply a pea-sized amount of fluoride toothpaste.
- Hold the brush at a 45-degree angle to your gumline. This angle lets the bristles sweep into the sulcus (the tiny groove between tooth and gum) where plaque hides.
- Use small, circular motions or let the electric brush do the work. Don’t scrub side-to-side like you’re sanding drywall.
- Spend 30 seconds per quadrant, upper right, upper left, lower right, lower left. Most electric brushes have built-in timers.
- Brush the chewing surfaces with back-and-forth strokes, then tilt the brush vertically to clean behind your front teeth.
- Don’t rinse immediately. Spit out excess toothpaste, but let the fluoride sit on your enamel for maximum benefit.
According to guidelines from dental care experts, replacing your brush head every three months, or sooner if bristles fray, keeps cleaning effective. Worn bristles can’t disrupt plaque biofilm.
Advanced Flossing and Interdental Cleaning Methods
Flossing isn’t optional, it’s the only way to clean the 35% of tooth surface your brush can’t reach. But most people do it wrong.
- Start with 18 inches of floss. Wrap most around your middle fingers, leaving 2 inches of working length.
- Guide the floss between teeth with a gentle sawing motion. Don’t snap it down: you’ll bruise your gums.
- Curve the floss into a C-shape around each tooth and slide it below the gumline. Move it up and down 2-3 times to scrape off plaque.
- Use a clean section for each gap to avoid spreading bacteria.
For wider gaps or bridgework, interdental brushes work better than floss. Insert the brush gently, twist it a few times, and pull it out. Rinse and repeat. These brushes reach areas floss glides past, especially around molars.
Water flossers are a solid backup, set the pressure to medium, aim the tip at a 90-degree angle to the gumline, and trace along each tooth. They’re excellent for people with braces, implants, or gum sensitivity. Studies published by home organization and cleaning specialists note that water flossers reduce gingival bleeding when used daily along with traditional flossing.
Natural Remedies and DIY Solutions for Deeper Cleaning
Natural doesn’t always mean effective, but a few remedies have solid backing, and a few are pure folk nonsense.
What Actually Works:
- Baking soda paste: Mix 1 teaspoon baking soda with a few drops of water to form a paste. Brush gently for no more than two minutes, once or twice a week. Baking soda is mildly abrasive (RDA of ~70, compared to toothpaste’s 70-150), so it polishes surface stains without wrecking enamel. Overuse can erode enamel, so keep it occasional.
- Hydrogen peroxide rinse: Swish 1 tablespoon of 3% hydrogen peroxide diluted in 1 tablespoon of water for 30-60 seconds, then spit. It’s antibacterial and helps whiten teeth. Don’t swallow it, and don’t use it daily, it can irritate soft tissue.
- Oil pulling: Swishing 1 tablespoon of coconut oil for 10-15 minutes may reduce plaque and gingivitis, per some small studies. It’s not a substitute for brushing, but it’s harmless if you’ve got time to kill.
- Saltwater rinse: Dissolve 1/2 teaspoon of salt in 8 ounces of warm water. Rinse for 30 seconds. It’s soothing for inflamed gums and mildly antibacterial.
What Doesn’t Work (or Worse, Damages):
- Activated charcoal: Too abrasive. It’ll strip enamel over time and offers zero fluoride protection.
- Lemon juice or vinegar: Acidic enough to demineralize enamel. Just say no.
- Straight baking soda as daily toothpaste: Lacks fluoride. You need fluoride to remineralize enamel and prevent cavities.
Natural remedies can complement a solid brushing and flossing routine, much like targeted home cleaning techniques enhance your regular housework. They’re not magic bullets.
Common Mistakes to Avoid When Deep Cleaning at Home
Even well-intentioned DIYers screw this up. Here’s what trips people up:
1. Brushing right after eating acidic foods. If you’ve just had citrus, soda, or tomato sauce, your enamel is temporarily softened. Brushing immediately can wear it away. Wait 30 minutes, or rinse with water first.
2. Skipping the tongue. Your tongue harbors bacteria that redeposit onto your teeth. Scrape it gently from back to front after brushing.
3. Using too much pressure. Let the tools do the work. Jamming an interdental brush or sawing floss like you’re cutting lumber damages gum tissue and doesn’t remove more plaque. If your gums bleed consistently after a week of proper technique, see a dentist, you might have gingivitis.
4. Ignoring the gumline. Most cavities and gum disease start at the margin where tooth meets gum. Angle your brush and floss to clean that zone thoroughly.
5. Inconsistent routine. Deep cleaning once a month won’t cut it. Plaque reforms within hours. Brush twice daily for two minutes, floss once, and use interdental brushes or a water flosser as needed. According to home care and cleaning resources, consistency beats intensity every time, whether you’re maintaining your home or your teeth.
6. DIY tartar removal. You can’t safely remove hardened tartar at home. Attempting it with metal tools or abrasive pastes risks permanent damage. If you see yellow or brown deposits that won’t budge, book a professional cleaning.
7. Overdoing whitening or abrasives. Baking soda, peroxide, and whitening strips have their place, but daily use thins enamel. Limit aggressive treatments to once or twice a week.
8. Ignoring pain or bleeding. A little tenderness when you start flossing is normal: persistent pain, swelling, or bleeding isn’t. Those are red flags for infection or gum disease.
When to Call a Professional
At-home deep cleaning is preventive, not corrective. If you’ve got any of the following, skip the DIY and get to a dentist:
- Visible tartar buildup (hard, discolored deposits)
- Gum pockets deeper than 3mm (measured during a dental exam)
- Persistent bad breath even though good hygiene
- Tooth sensitivity to hot, cold, or sweets
- Loose teeth or receding gums
- Bleeding that doesn’t improve after a week of proper brushing and flossing
Some states require a licensed hygienist for any procedure involving scaling below the gumline. Even if it’s legal, it’s not smart to attempt it yourself. You can maintain health between visits, but you can’t replace professional diagnostics and treatment.
Deep cleaning at home is about discipline, the right tools, and knowing your limits. It’s the dental equivalent of keeping a tight maintenance schedule on your home, you can handle the routine tasks, but you call in the pros for anything structural. Brush smart, floss daily, and keep those six-month checkups. Your teeth, and your wallet, will thank you.